Inline Editing in Step 1 of Payroll Processing
Read about our new update to step 1 of payroll processing, which allows you edit all employee wages and hours on a single page.
Inline Editing in Step 1 of Payroll Processing
Namely is on a mission to simplify payroll processing, and we’re proud to announce the release of our first major milestone in that mission—Inline Editing.
With Inline Editing, payroll administrators can make edits to each of their employees’ hours and wages, add checks or additional payments, and make notes about those payments—all on a single page.
No more having to jump back and forth between your list of employees and a separate window to edit wages or hours. With just a few clicks, you can expand an employee’s check, make and save any required changes, and move on to the next employee.
Expanding, Editing, and Adding Employee Checks
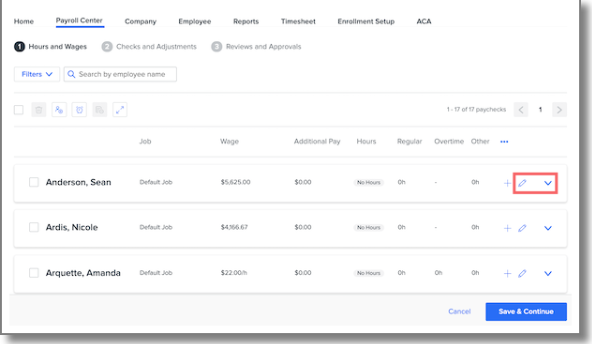
To view all wage details for an employee’s check, click the down arrow to expand it.
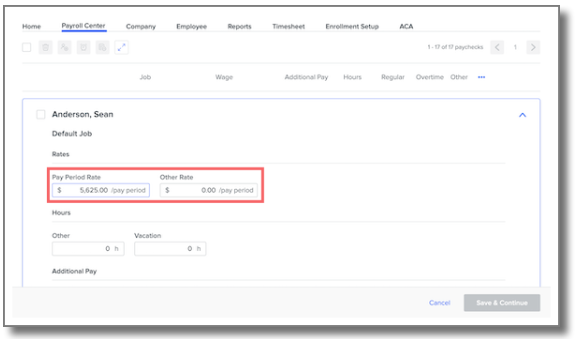
If you need to make edits to a check, click the pencil icon. The check will expand in edit mode and you can make changes to the employee’s Rates, Hours, and Additional Pay. Click Save to keep any changes you make.
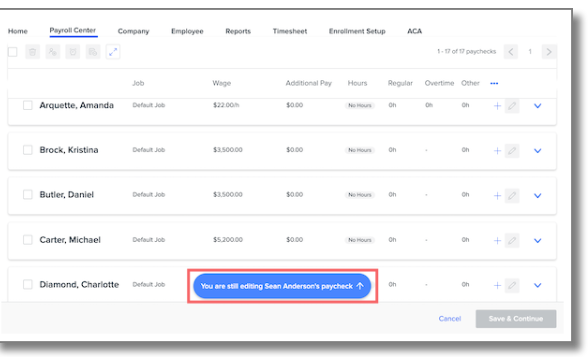
To help keep your screen tidy, you can only edit one check at a time. If you scroll above or below a check that’s in edit mode, you’ll be reminded that you’re currently making changes to a check. Click the reminder to return to the check.
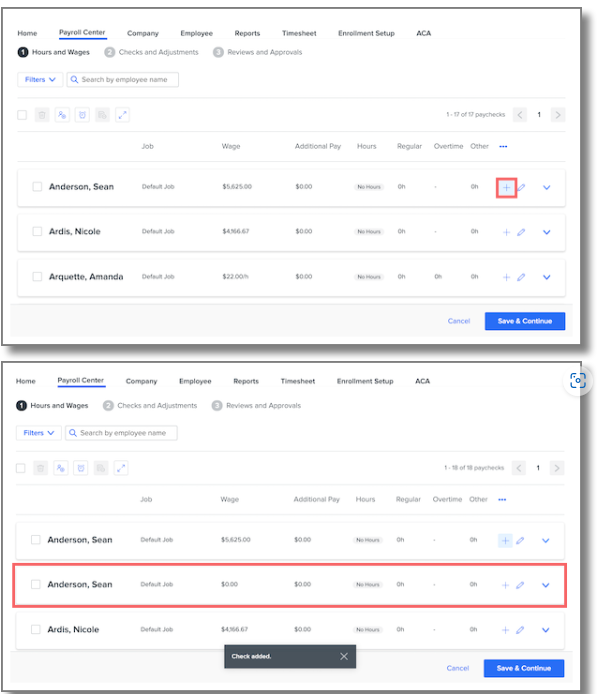
If you want to add a check for an employee, click the + icon on the employee’s current check. A new check will be added below it.
Sticky, Customizable Column Headers
More pay types means more columns in your pay cycle—and depending on how many we’re talking about, your view of your pay cycle could quickly become unmanageable.
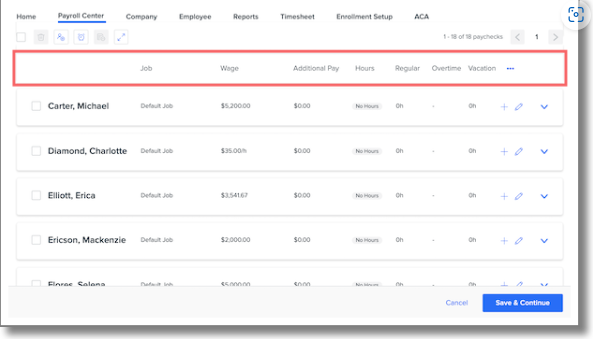
That’s why we’ve adjusted pay type column headers to be a little less chaotic. You’ll always see regular and overtime hours displayed, but you can adjust the third pay type column to swap between any of your custom pay types.
Just click the menu next to the Other column to select from a list of all your pay types.
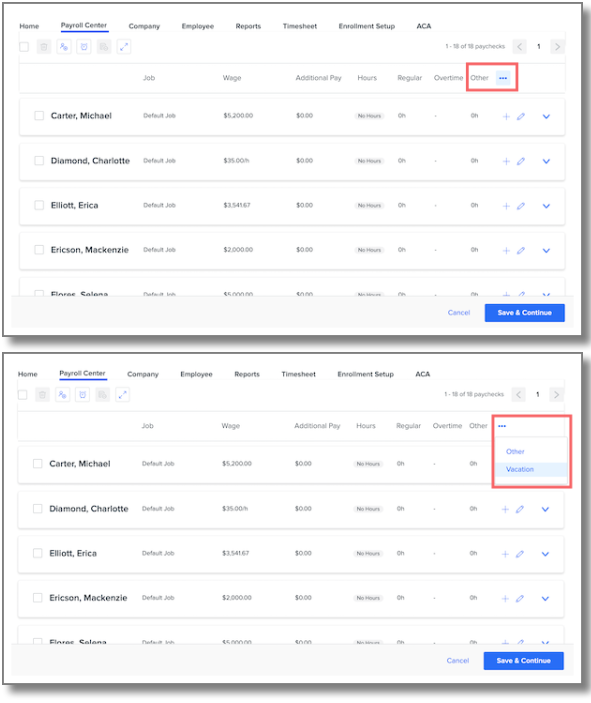
Column headers are also sticky, so they’ll stay visible at the top of your screen as you scroll through your employee list.
New Action Buttons
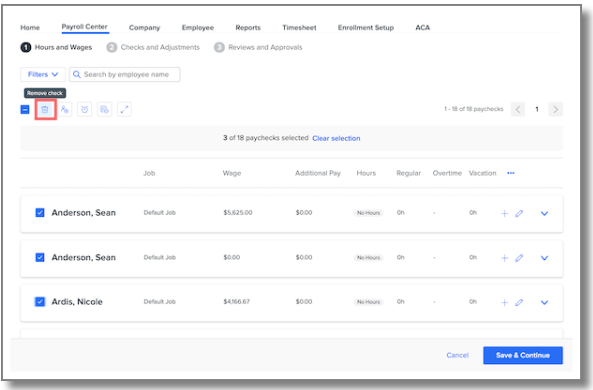
There are six new action buttons that allow you to apply an action to the pay cycle or selected paychecks within the cycle.
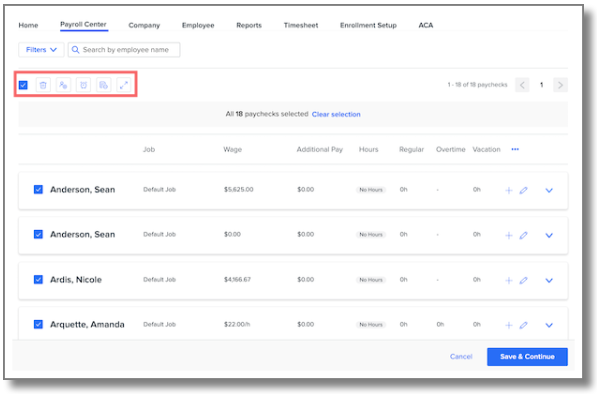
Hover over each button for a description of what it does. Some actions can only be used when at least one check is selected.
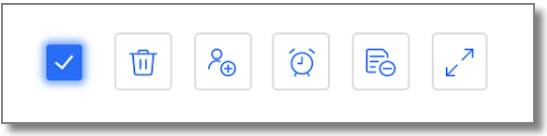
Button descriptions from left to right:
-
Select/Deselect All: Select or deselect all checks. If you have multiple pages of checks, you have the option to select all checks on the current page or all checks in the pay cycle. In either case, this action respects any filters you've applied.
-
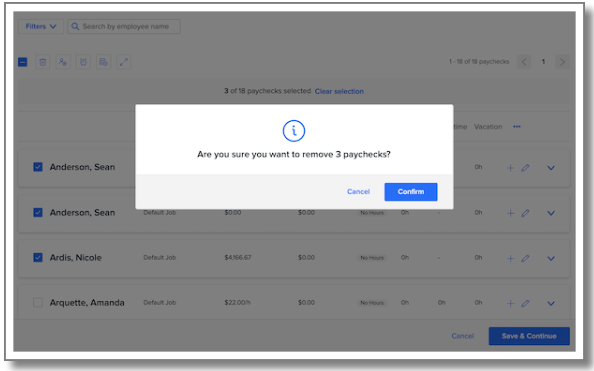
Remove Check(s): Remove all selected checks.
-
Add Employee: Add an employee to the pay cycle.
-
Sync, Upload, and Preview Hours: Click to bring in hours worked from Namely Time, Timesheets, or another third party time-keeping platform.
-
Zero wages: Zero out wages on all selected checks.
-
Expand/Collapse All Checks: Expand or collapse all checks in the pay cycle for a more detailed look at all of your employee wages.
New Checkbox Behavior
Previously, checkboxes next to each employee’s name were selected by default. Deselecting an employee and moving to step 2 would remove that employee from the pay cycle.
We’ve updated how checkboxes work so they behave more intuitively. Now you can use checkboxes to apply an action to multiple employee checks at a time.
-
Please note: Deselecting a checkbox on an employee’s check and moving to step 2 will no longer remove the employee from the pay cycle. Please select the employee and click the Remove Check(s) icon (as described below) to remove the employee’s check from the cycle.
Start by selecting which employee checks you want to apply an action to. A banner will surface at the top of the page telling you how many checks you’ve selected. You can undo these selections by clicking Clear Selection.
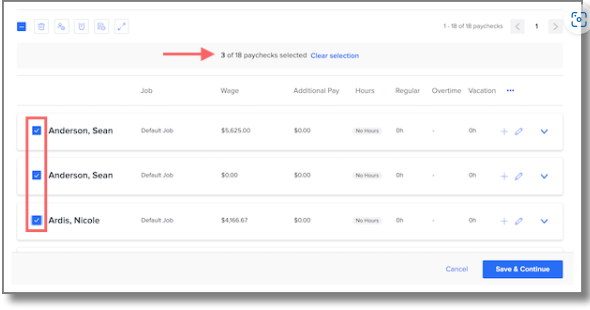
Then, click an action to apply it to the selected checks.
A confirmation modal will prevent you from taking any actions accidentally.
Selecting a Few Employees for Manual Pay Cycles
If you need to process a manual pay cycle for a few employees:
-
Click Select All.
-
If you have multiple pages of checks, click Select all from pay cycle.
-
-
Use the Search by employee name box to find the employee(s) for whom you want to process the manual cycle.
-
Deselect the employee(s) for whom you want to you want to process the manual cycle.
-
Click Remove Checks.
Only the desired employees will remain in your manual cycle.